Table of Contents
Let's face it, keeping kids entertained outdoors without breaking the bank feels like a modern-day quest. Those pre-fab plastic monstrosities cost a fortune and often look... well, like pre-fab plastic monstrosities. Maybe you've got a specific vision for your backyard, or perhaps you just like the idea of building something solid with your own hands. That's where exploring diy backyard playground plans comes in. It's not just about saving a few bucks, though that's a nice bonus. It's about creating a unique space tailored to your kids' ages, your yard's quirks, and your own skill level.
Considering DIY Backyard Playground Plans? Why It Might Be Right for You
Considering DIY Backyard Playground Plans? Why It Might Be Right for You
Beyond the Big Box Store: Why Go DIY?
So, you're staring at that empty patch of grass out back, picturing swings and slides, maybe even a little fort. Your first thought might be to hit up the nearest big-box store or order a kit online. And yeah, that's a path. But have you really looked at those things? Often they feel flimsy, designed for a specific age range your kid will outgrow in a year, and let's not even talk about the price tag for something half decent. Considering diy backyard playground plans opens up a different world.
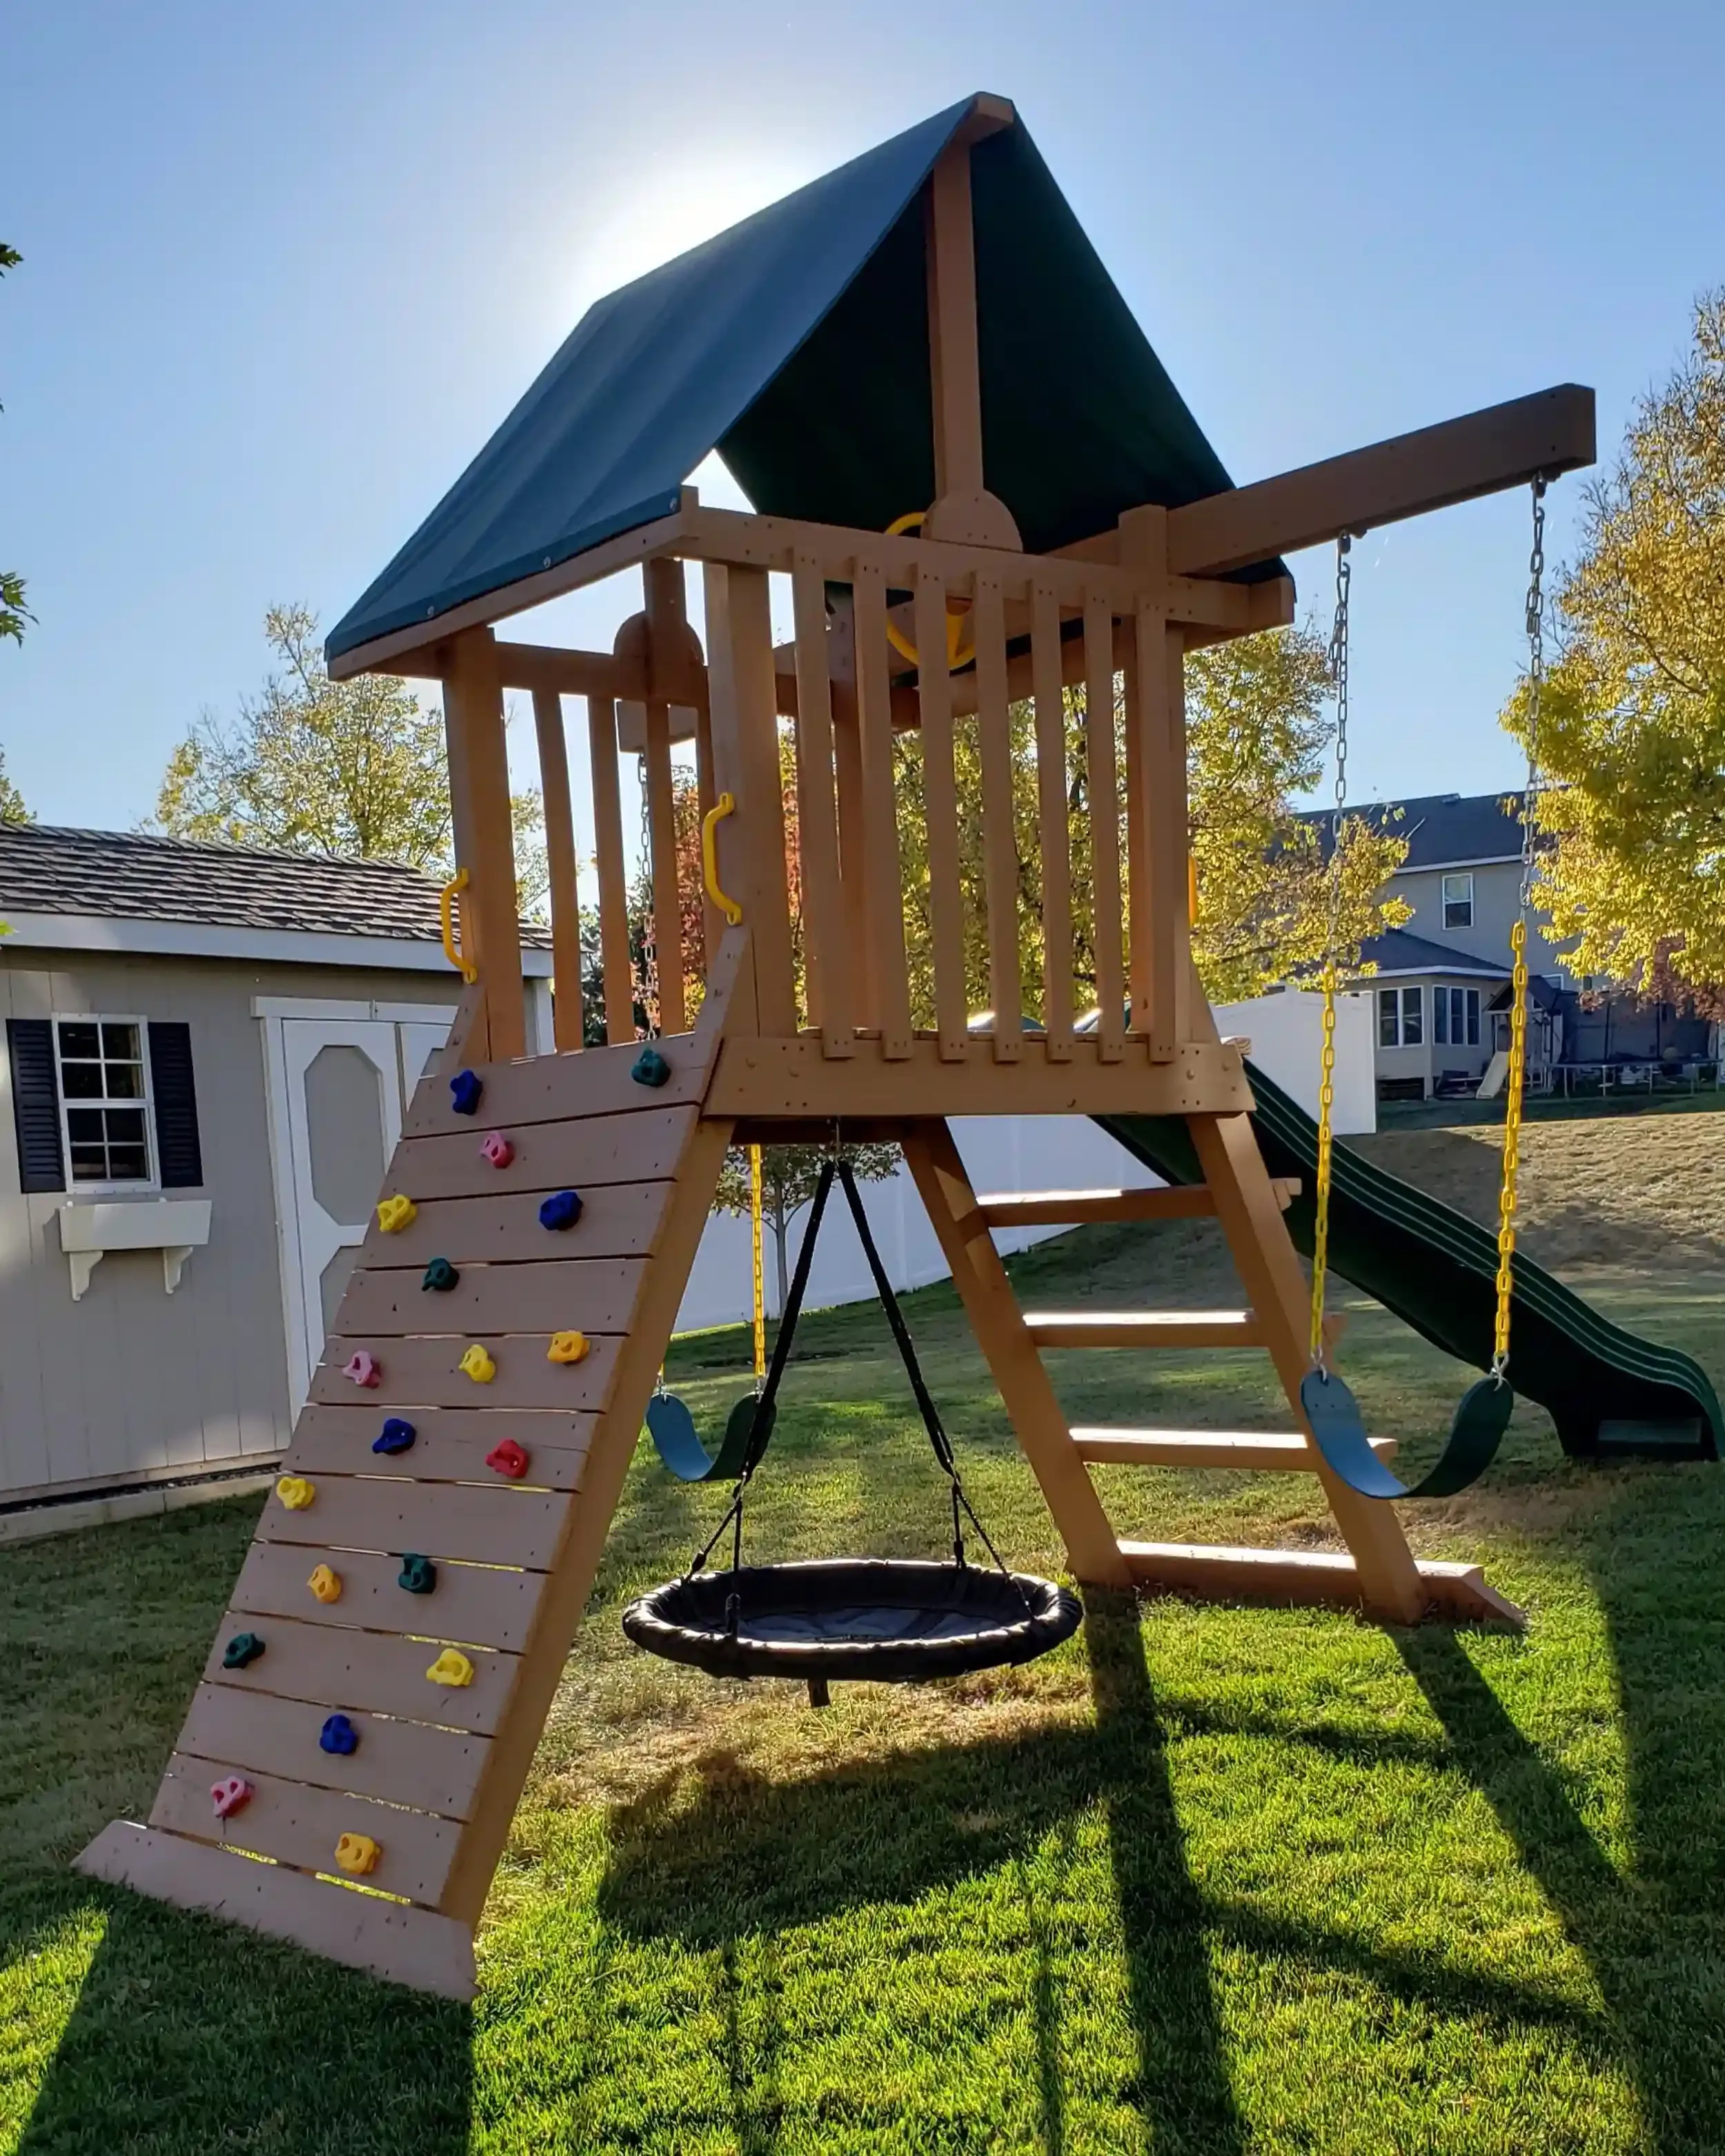
Building it yourself gives you control. You pick the materials – solid lumber that won't wobble when a determined six-year-old launches themselves off the side. You design it to fit your specific space, not some generic footprint. Need a extra-long slide because you have a slight hill? Want a rock wall that actually challenges them? DIY lets you make those calls. Plus, there's a certain satisfaction in seeing something you built standing proudly in your yard, knowing exactly how sturdy it is because you put every screw in.
- Customization: Tailor height, features, and size to your kids and yard.
- Durability: Choose quality materials that will last.
- Cost-Effectiveness: Often cheaper than comparable store-bought sets.
- Skill Building: A great project to learn or hone woodworking skills.
- Personal Touch: Create a truly unique play space.
It's More Than Wood and Nails: The Value Proposition
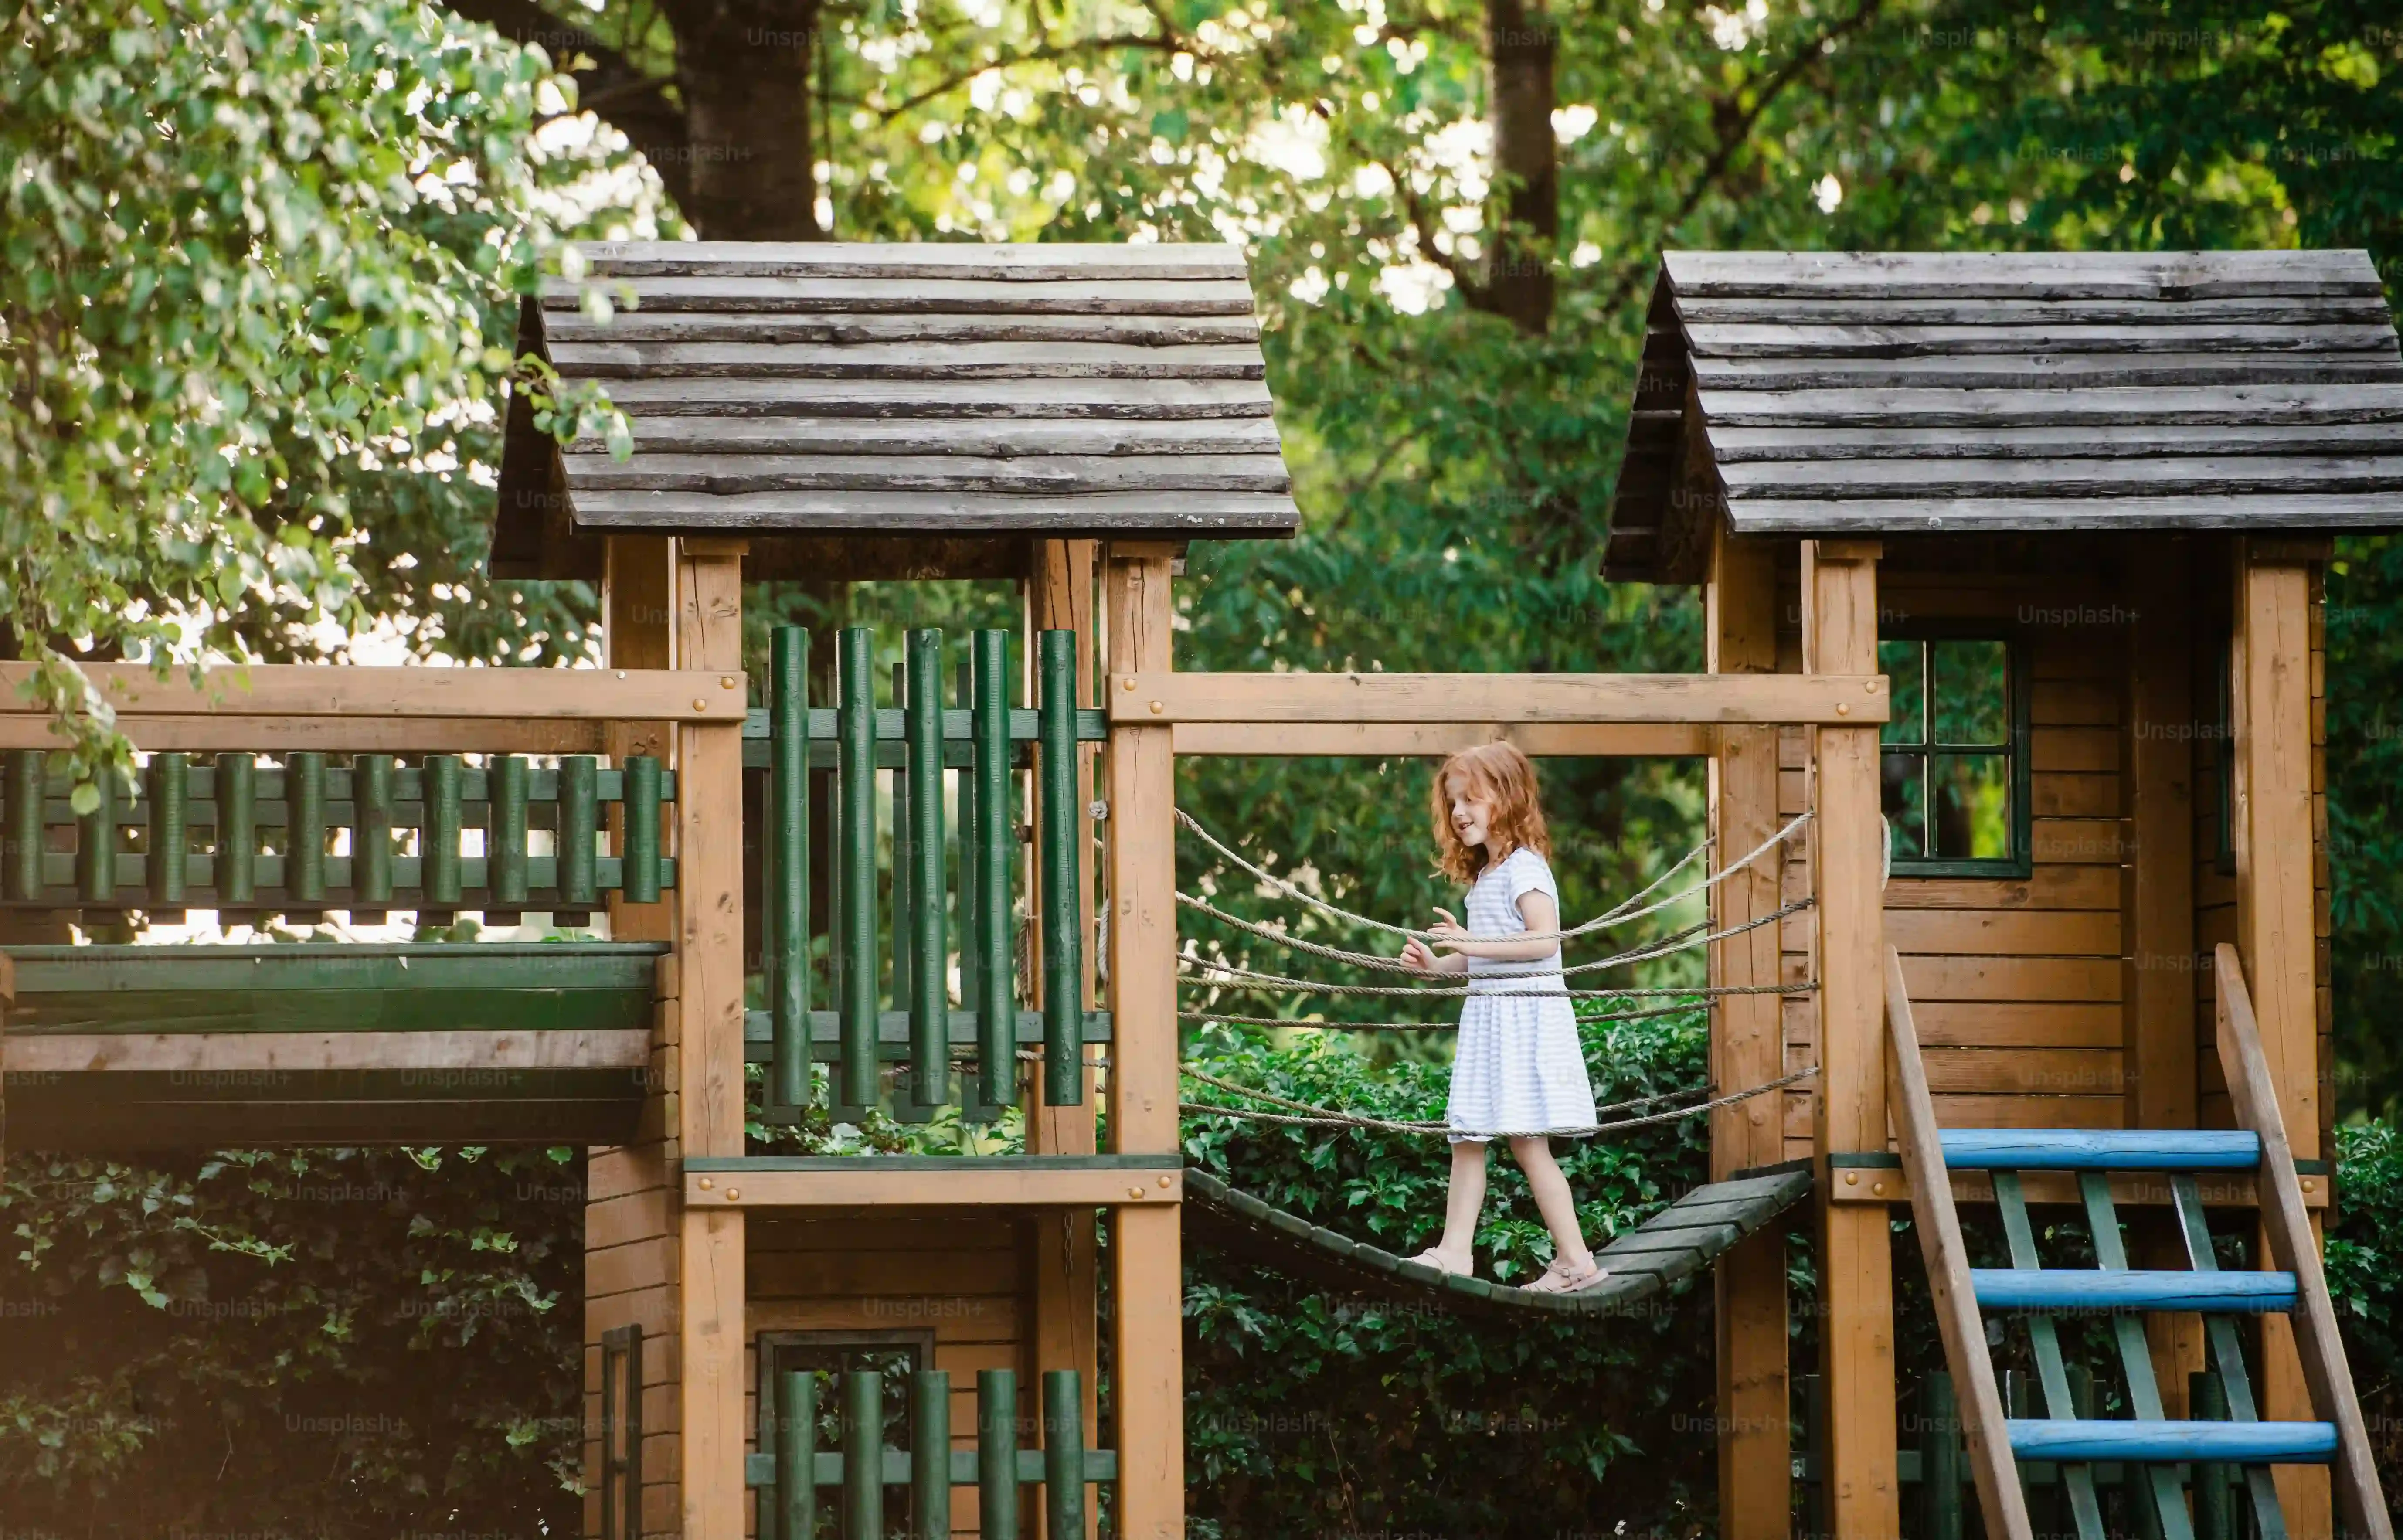
Thinking about diy backyard playground plans isn't just a practical decision; it's an investment in your home and your kids' childhoods. A well-built structure adds value to your property, sure, but the real return is in the memories made. Watching your kids climb, swing, and imagine on something you built is a different kind of reward than assembling particleboard furniture. It's tangible, it's personal.
You're not just buying a product; you're engaging in a process. There will be trips to the lumber yard, sawdust in places you didn't know existed, maybe a few moments questioning your sanity. But there will also be the quiet focus of cutting wood, the satisfying thud of hammering, and the shared excitement with your kids as the structure takes shape. It's a project that involves the whole family, teaching patience, problem-solving, and the value of hard work. Compared to clicking 'add to cart,' it's a richer experience.
Planning Your Backyard Play Space
Planning Your Backyard Play Space
Planning Your Backyard Play Space
Alright, before you start buying two-by-fours and measuring tape, you need a game plan. This isn't just about picking pretty diy backyard playground plans; it's about fitting a whole play universe into your specific patch of dirt. Walk around your yard. Look at the size, the shape, where the sun hits hardest, where the water pools after a rain. Are there trees? Fences? That weird shed your uncle uses to store questionable items? All of it matters. Think about your kids right now – what do they love to do? Climb? Swing? Pretend they're pirates? Now, think about them in three, five, even ten years. Building something they'll outgrow next summer is a waste of effort and lumber. Jot down ideas, sketch out the space, and consider what features are non-negotiable versus nice-to-haves. This initial planning phase saves you headaches (and costly mistakes) down the line.
Picking the Perfect DIY Backyard Playground Plan
Picking the Perfect DIY Backyard Playground Plan
Navigating the Sea of DIY Backyard Playground Plans
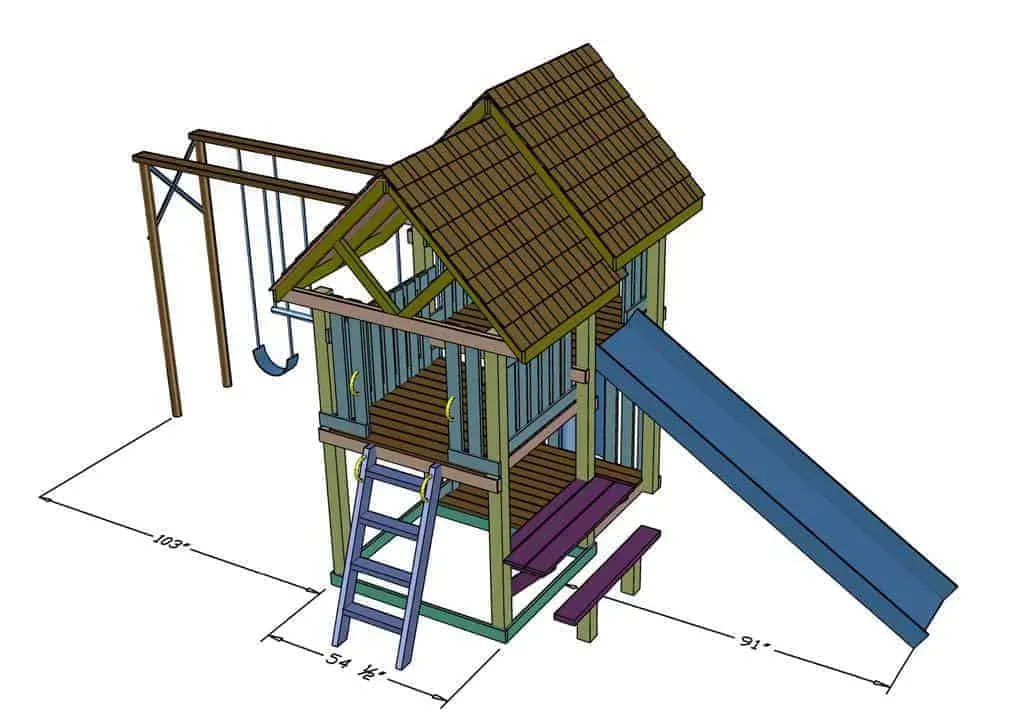
you've measured, you've sketched, you've dreamed. Now comes the fun part: actually finding the blueprints for your backyard masterpiece. A quick search for "diy backyard playground plans" throws up a dizzying array of options. Simple A-frames, elaborate forts with multiple levels, swing sets integrated with climbing walls – it's all out there. Don't get overwhelmed. Go back to your planning notes. That awkward corner of the yard? That eliminates plans requiring a massive footprint. Kids still toddlers? Maybe skip the 8-foot-high slide for now and look for plans with lower platforms and toddler swings. Have a specific feature your kids are begging for, like monkey bars or a sandbox? Filter your search based on those must-haves. Think of it like finding the right recipe; you wouldn't try to bake a complicated cake if you only have flour and water.
Not all plans are created equal, though. Some free ones you find online might be little more than a shaky diagram drawn on a napkin. Others are detailed, professional documents with cut lists, diagrams for every joint, and safety notes. When you're sifting through potential diy backyard playground plans, look for clarity and detail. A good plan doesn't just show you what it looks like finished; it shows you *how* to get there, step by step. It should list exactly what materials you need, down to the specific lengths of lumber and the types and quantities of fasteners. If a plan feels vague or skips crucial steps, move on. Your sanity (and the safety of your kids) depends on it.
- Clear, step-by-step instructions.
- Detailed material list (lumber sizes, hardware types).
- Cut list (specific lengths of each piece).
- Safety considerations and recommended practices.
- Multiple diagrams or illustrations from different angles.
- Foundation or anchoring instructions.
Evaluating Plans for Detail and Safety
Beyond just looking pretty, a solid set of diy backyard playground plans builds safety into the design. Does it specify the correct spacing for swings? Does it recommend safe heights for platforms based on age ranges? Are there notes on preventing pinch points or head entrapment hazards? These aren't minor details; they're critical for preventing injuries. Professional plans, like those based on Consumer Product Safety Commission guidelines, will address these points explicitly. Don't assume every plan you find online has been vetted for safety. Use common sense and trust your gut. If a plan seems too simple or too quick, it might be cutting corners you shouldn't ignore.
Assembling Your Playground: Tips for Success
Assembling Your Playground: Tips for Success
Prepping for the Build: Measure Twice, Cut Once (Seriously)
plans in hand, lumber delivered, hardware sorted (hopefully). Now comes the moment of truth: putting it all together. Before you grab that saw, take a deep breath. Read through your chosen diy backyard playground plans one more time, from start to finish. Understand the sequence of steps. Lay out your materials if you have the space, grouping similar pieces. Don't just eyeball cuts; measure precisely. A piece that's off by half an inch now can cause headaches and wobbly joints later. Double-checking everything *before* you make a permanent cut saves wood, time, and your temper. Think of it as the carpentry version of proofreading. Skipping this step guarantees frustration.
Putting the Pieces Together: Patience and Power Tools
Building a playground isn't a race. Take your time, especially when working with larger pieces or at height. Get a friend to help when lifting heavy beams or steadying uprights. Power tools are great, but they demand respect; read the manuals, use safety glasses, and keep distractions to a minimum. Follow the plan's instructions for fasteners – using the wrong type or size of screw or bolt compromises the structure's integrity. If something doesn't seem to fit quite right, stop and figure out why instead of forcing it. Forcing wood and metal together usually results in broken parts or a structure that's less than stable. Remember, this isn't just a project; it's where your kids will be playing.
Here are a few key things to keep in mind during assembly:
- Work on a level surface whenever possible.
- Predrill holes for screws near edges to prevent splitting.
- Use a level frequently as you build vertically.
- Don't fully tighten all fasteners until sections are properly aligned.
- Check the plan's hardware list against what you have before starting.
- Wear appropriate safety gear: glasses, gloves, ear protection.
Finishing Touches and Keeping Your DIY Backyard Playground Safe
Finishing Touches and Keeping Your DIY Backyard Playground Safe
Making It Smooth and Protected
You've got the frame up, the swings hanging, maybe even the slide bolted on. It looks like a playground! But before you unleash the kids, there's crucial work left: the finishing touches. This isn't just about making it look pretty; it's about splinter-free hands and weather resistance. Grab your sandpaper – you'll need plenty. Go over every surface, especially edges and corners, until they're smooth. Think about little hands running along railings and climbing on beams. Any rough spot is an invitation for a nasty splinter. Don't rush this part. It's tedious, sure, but essential.
Once it's smooth, you need to protect the wood. Outdoor wood is constantly battling sun, rain, and creepy crawlies. A good quality exterior stain or sealant is your armor. Choose one that's non-toxic once cured. Apply it evenly, following the product instructions. This step prevents rot, warping, and extends the life of your hard work significantly. Skipping it is like buying a car and never changing the oil – things will fall apart faster than you think.
Ground Rules: Cushioning Falls
the structure is built and sealed. Now look down. What's under it? Grass? Concrete? Neither is a great option when a kid inevitably misses a step or decides gravity is just a suggestion. The ground surface is as critical to safety as the structure itself. You need a forgiving landing zone. Think about the height of your highest platform or swing. The Consumer Product Safety Commission (CPSC) has guidelines for this, but generally, the higher the fall potential, the deeper the protective surfacing needs to be.
Common materials include wood chips, mulch, sand, or shredded rubber. Pea gravel is sometimes used, but it can be less stable and harder to move through. You'll need to excavate the area under and around the playground structure – extending at least six feet in all directions from the edge of stationary equipment, and further out from swings. Install a border (like landscape timbers) to contain your chosen material, then fill it to the recommended depth. This creates a safety zone that absorbs impact and reduces the risk of serious injury from falls.
Recommended Safety Surfacing Depths (Based on 6-Foot Fall Height):
- Wood Chips/Mulch: 9 inches
- Sand: 9 inches
- Shredded Rubber: 6 inches
- Pea Gravel: 9 inches
Keeping It Shipshape: Ongoing Maintenance
Building it was a project, but keeping it safe and functional is an ongoing commitment. Your DIY backyard playground isn't a "set it and forget it" deal. Wood expands and contracts with weather changes, fasteners can loosen with use, and wear and tear happens. Make a habit of regular inspections. Check all bolts and screws – tighten anything that feels loose. Look for cracks or splinters in the wood. Sand and reseal as needed, typically every year or two depending on your climate and the product you used. Inspect swing chains and ropes for wear. Make sure slide connections are secure.
Also, keep the safety surfacing level and free of debris. Rake it regularly to check the depth and remove leaves, sticks, or anything else kids could trip on or land on awkwardly. Over time, materials like mulch or sand can compact or scatter, reducing their effectiveness. You'll need to top them up periodically. A few minutes of maintenance here and there prevents bigger problems (and potential injuries) down the road, ensuring your DIY masterpiece remains a safe haven for play for years to come.
Your Backyard Playground: Built, Not Bought
So, you've navigated the lumber aisle, wrestled with fasteners, and maybe even questioned your life choices somewhere between step 7 and step 12. But look at what you've got: a solid, personalized playground standing right there in your backyard. It's not just a structure; it's a space built specifically for the little humans who will fill it with shrieks, laughter, and maybe a few inevitable tumbles (that's what soft landings are for). You didn't just assemble a kit; you invested time and effort into creating something real, something that fits your space and your kids' imaginations better than anything mass-produced ever could. Now, grab a cold drink, watch them play, and try not to look too smug when the neighbors ask where you bought it.